Northshoreislife
Member
- Joined
- May 12, 2021
- Messages
- 17
- Reaction score
- 32
- Points
- 13
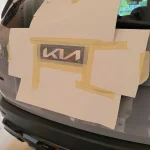
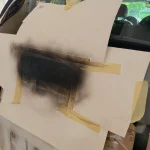
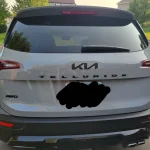
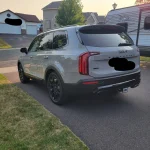
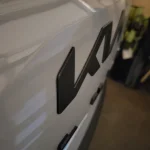
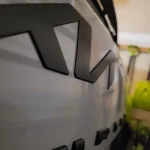
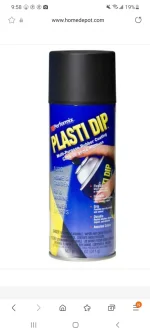
A little project this Monday evening....plasti-dip for the back logo.
I have a Nightfall Wolf Gray SXP and while I don't mind the new logo style, it drives me crazy to have the silver logo when everything else is black. So, I fixed it!
I have a Nightfall Wolf Gray SXP and while I don't mind the new logo style, it drives me crazy to have the silver logo when everything else is black. So, I fixed it!