• Hint: Use a descriptive title for your new message
    If you're looking for help and want to draw people in who can assist you, use a descriptive subject title when posting your message. In other words, "I need help with my SUV" could be about anything and can easily be overlooked by people who can help. However, "I need help with my transmission" will draw interest from people who can help with a transmission specific issue. Be as descriptive as you can. Please also post in the appropriate forum. The "Lounge" is for introducing yourself. If you need help with your leather interior, please post in the Interior section - and so on... This message can be closed by clicking the X in the top right corner.
  • Car enthusiast? Join us on Cars Connected! iOS | Android | Desktop

After market running board install problem

I just wanted to jump in and say thank you for the pics. I was looking over the Black Horse installation instructions and the removal of the cover/panel in the very beginning and end (for trimming) were a bit confusing. Like Caius, I thought the part that needed to be removed was the bottom panel that you see after opening the 2 doors. It probably didn't help that I was also looking over the OEM Side Step instructions as well to get a better idea of things which does show this step. But anyways, thanks again!
You are very welcome. Glad I could help you and hopefully anyone else thinking of going with this option. I think they look better than OEM and definitely very affordable 🥳
 
Hi. I just completed my install on these running boards as well. Do you have any issues with the bottom cover, for the lack of a better description, "flapping in the wind" after cutting? I'm wondering if I should somehow tape it up so air/dirt doesn't get caught.
 
Hi. I just completed my install on these running boards as well. Do you have any issues with the bottom cover, for the lack of a better description, "flapping in the wind" after cutting? I'm wondering if I should somehow tape it up so air/dirt doesn't get caught.
I do notice some noise which wasn't there before and does sound like that's what it is. I'm also a little worried about snow, salt, and other general crud getting caught up in there
 
I do notice some noise which wasn't there before and does sound like that's what it is. I'm also a little worried about snow, salt, and other general crud getting caught up in there
I don’t have any noise after installation. I had to cut it as well but I made sure to trim only where the brackets where located enough for it to clear. Wouldn’t be a bad idead to some how tape it if you are worried about the weather road salt or the noise it’s creating if that’s the culprit.
______________________________
 
@Socal949 thanks for all the pix and tips!

I've been in the market for running boards for a while and was looking for a shop in the NYC area to install. I might just do it myself now.

Were you able to work on the boards without lifting the Telly?
 
@Socal949 thanks for all the pix and tips!

I've been in the market for running boards for a while and was looking for a shop in the NYC area to install. I might just do it myself now.

Were you able to work on the boards without lifting the Telly?
I was able to, but it’s way better to install if you lift up the car.
 
@Socal949 thanks for all the pix and tips!

I've been in the market for running boards for a while and was looking for a shop in the NYC area to install. I might just do it myself now.

Were you able to work on the boards without lifting the Telly?
I also did it myself without a lift. Most of it was fine, but once the boards were on it was a tight squeeze to get back under to reinstall the trim.
 
I also did it myself without a lift. Most of it was fine, but once the boards were on it was a tight squeeze to get back under to reinstall the trim.
You can absolutely do the install without lifting the car that’s how I did it. Word of advice though! Follow these steps. 1.Remove bottom trim. 2.Install the brackets. 3.Cut the Trim and install the bottom trim. 4. Last step is to install the boards to the 3 brackets. I did the mistake to try and install the trim last and had a hard time reaching the back screws that hold the bottom trim. 👍🤣 Glad I could help. I have plenty of pics. If anyone runs into any issues definitely let me know. I can try and help/assist with some of my knowledge.
______________________________
 
Last edited:
Here is what helped me. I installed all the brackets first and after that I installed the cover back on to help me hold it up then I took a sharpie and traced it so I could make the cuts. That was the hardest part. But the 2nd side I made it easier on myself. What I did was measured the brackets and traced them on the floor made the cuts and after the brackets where on I took the bottom texture piece and tried putting it back on to see if it would clear. If it didn’t I would trace and trim a little more until it was clearly clearing the brackets and it would sit flush. Here are pics of the first bracket. Your brackets looks exactly the same correct?
@Socal949 , could I ask about the cutting/trimming. I'll be installing these this weekend.

Any reason we can't just make a slit cut just the thickness of the vertical part of the bracket and slide it into place.

I see you cut the the cover to the exact wide the horizontal portion of tb bracket, but it looks like you just need slide it into place.

Maybe I'm incorrect. Just basing it off your pictures.

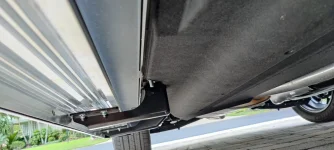
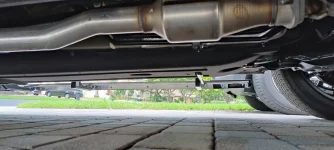
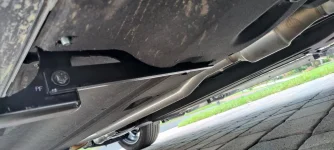
Do you have pictures from underneath now that the whole install is complete.

Thanks in advance.
Hi there. Yes I will gladly take some pictures of the underneath with everything installed. Will be hard to get good pictures unless I put on a lift. But I will take some. The reason I cut around to the exact measurements of the brackets is because of the added pressure caused when trying to install the cover back on. It wouldn’t align properly. It was hard to hold and tighten down screws. You just can’t slice it.
 
Last edited:
Hi there. Yes I will gladly take some pictures of the underneath with everything installed. Will be hard to get good pictures unless I have it put on a lift. But I will take some. The reason I cut around to the exact measurements of the brackets is because of the added pressure caused when trying to install the cover back on. It wouldn’t align properly and was hard to hold and tight down screws. You just can’t slice it.
Thank you!
 
I'm slightly concerned about some reports regarding the flapping noise from the cover.

You didn't experience any?
I haven’t had any issues at all! If you cut just enough to clear the brackets you shouldn’t have any issues with wind noise. I haven’t noticed anything and I’ve had mine on for the past 2 months if not more.
 
I haven’t had any issues at all! If you cut just enough to clear the brackets you shouldn’t have any issues with wind noise. I haven’t noticed anything and I’ve had mine on for the past 2 months if not more.
Thank you again.
 
IMG_20211023_161844.webp
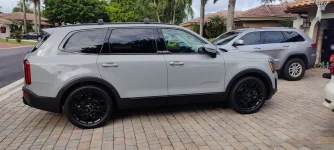
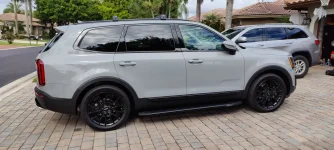
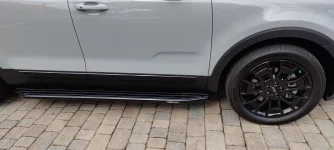
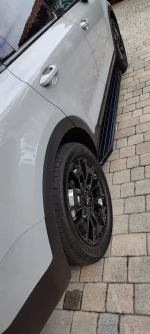
They went on with no problems at all.
______________________________
 
Perfect that looks better! Did you the install yourself?
Yes. Took about two hours. The instruction sheet was pretty accurate and straight forward. Thanks for your help regarding the trimming. On the three smaller screws that previously held the cover by the pinch weld, I didn't trim off the holes on the cover. I placed the nut through the cover onto the the threaded stud so that the cover was secured on on both sides.

1) Removed the lower cover.
2) Installed the brackets.
3) Tightened up the larger nuts except the 1 smaller bolt and 2 nuts that hold the outside of the cover by the pinch weld.
3) Attached the cover back by the inside (muffler side) bolts. So it hangs making it easier to measure.
4) Lifted the cover up to the brackets, took a sharpie, Drew the bracket lines on the cover and dremmeled out/ cut the covers for the brackets in place.
5) Mounted the outside cover bolts and the last 2 brackets nuts that also hold the cover.
6) Installed the running board with the 6 bolts.

(Mine came with new running board black bolts, but the running board had 6 stainless bolts already mounted. So I used the mounted ones.)

IMG_20211024_142345.webpIMG_20211024_142331.webpIMG_20211024_142317.webpIMG_20211024_142252.webpIMG_20211024_142235.webp


Back
Top