• Hint: Use a descriptive title for your new message
    If you're looking for help and want to draw people in who can assist you, use a descriptive subject title when posting your message. In other words, "I need help with my SUV" could be about anything and can easily be overlooked by people who can help. However, "I need help with my transmission" will draw interest from people who can help with a transmission specific issue. Be as descriptive as you can. Please also post in the appropriate forum. The "Lounge" is for introducing yourself. If you need help with your leather interior, please post in the Interior section - and so on... This message can be closed by clicking the X in the top right corner.
  • Car enthusiast? Join us on Cars Connected! iOS | Android | Desktop

The 2023 Towing Saga Part 2 - Finally good news!

I have Redarc brake controller. Kia does not provide or have a brake controller available for the Telluride. The OEM harness that some of us are receiving for 2023 Tellurides includes the 4 wire pigtail harness that connexts the vehicle to majority of brake controllers is welcome, but the kit does not include a brake controller
I have a brake controller in mine. I ordered it with that pre installed. Not sure if that might be an sx prestige x/line thing or if its due to requesting it to be tow ready. Obviously as i am here tow ready is a joke from kia but either way the controller is there.
 
I promised I would work on the install last weekend, and so here's that detail. I tried to take a lot of relevant pictures, but feel free to ask questions if you have any. This will probably end up being several posts long to make things easier to type.

Step 1 is to remove everything from the luggage bin, including the cover for the luggage compartment and the jack cover on the left hand side. These just pull out. Nothing to it.

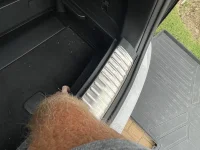
Step 2 is to remove the scuff plate trim (the chrome piece). It just pulls straight up with force to overcome the plastic trim clips. I pulled up from the right hand side first.

IMG_4572.webp

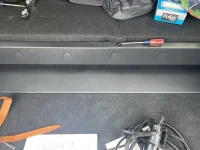
Step 3 is to remove the trim cover that is at the back of the luggage bin and attached to the 3rd row seats. You simply have to pry open one small retainer (shown with the screwdriver in it), and then pull the entire panel straight up from the floor.

IMG_4575.webp

You need to remove these two panels to make it easier to access the jack area in the following steps.
 
Step 4 is to remove the the jack tools and jack from the jack compartment.

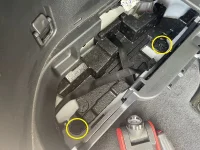
Step 5 is to remove the two trip clips that hold the jack foam into place. These are highlighted below. These clips are fairly difficult to remove, but they do just pull straight up and off.

IMG_4576.webp
 
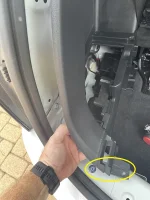
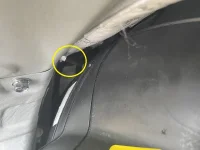
Step number 6 is to remove the screw at the bottom of the D-Pillar trim piece. This screw would have been hidden by the chrome scuff plate and is highlighted in the second picture below.

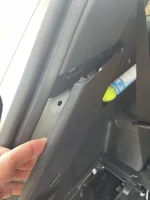
Step 7 is to start prying back the D-Pillar trim piece by prying with your hand at the top of the piece as shown here:
IMG_4580.webp

Step 8 is to keep carefully prying back the trim piece all the way to the bottom. You can see where I've highlighted the screw hole. NOTE: this trim piece will not be completely removed - only pried back as necessary.

IMG_4582.webp
______________________________
 
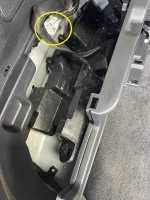
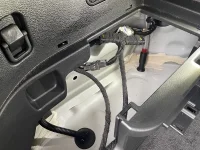
Step 9 is to remove the foam that holds the jack. You can do this while pulling up slightly on the foam while simultaneously prying the D-pillar trim piece back. Here you can also see where I've highlighted the trailer wiring connector.

IMG_4577.webp
 
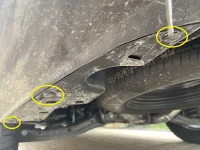
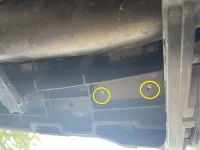
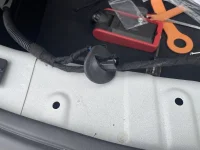
Now we go under the car, and we remove the three highlighted trim clips on the plastic cover under the left bumper. Simply use a screwdriver to pry out the center portion of the clip and they pull out. Once the three clips are out, pull straight down on the entire trim panel to remove. This takes some force.

IMG_4583.webp

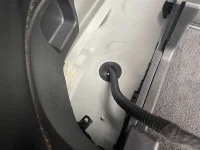
Once this trim panel is removed, you'll see the rubber grommet where the wiring will enter the cabin (under the jack). Remove the grommet and you'll see this hole:

IMG_4584.webp
 
Now we get to fabricate the mounting structure for the wiring. As posted in other places, I've used the E-Trailer E45ZR hitch. You may have different requirements for mounting if you're using a different hitch.

Note that I did not take pics on how to remove the trailer hitch trim cover, but you need to do that now. It involves 2 trim clips and 2 screws and a bit of pulling.

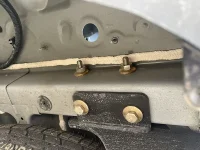
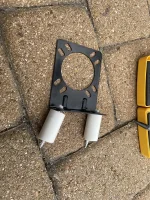
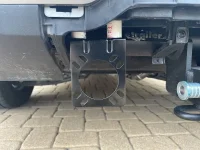
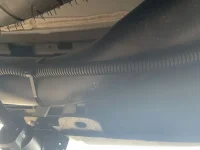
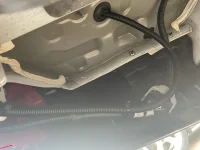
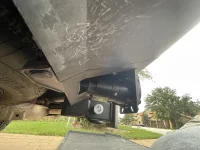
To mount the wiring, I'm using a Pollock 12-711UP mounting bracket. I decided to mount this bracket to the plastic bumper structure located just to the rear of the vehicle. Below are pictures of the place where I drilled pilot holes into the bumper for the mount. In order to get enough distance below this plastic bumper, I had to fabricate a "shim" that moves the entire Pollock mount down by 1.5". I did this by cutting two small pieces of 1/2" pvc pipe I had laying around. Then I used 2.5" outdoor rated deck screws to mount the Pollock adapter to the bumper. Hopefully pictures make this easier to understand:

IMG_4587.webp

IMG_4588.webp

IMG_4590.webp
 
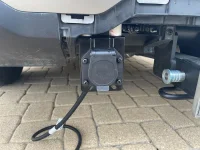
Time to wire things up now. First part of this is to insert the 7-pin connector through the Pollock mount.

IMG_4591.webp

From here, we need to run the wiring harness through the hole (where the grommet was) and into the cabin. Cut a slit into the grommet and run the wiring harness through that slit.

IMG_4592.webp

Then reinstall the grommet into the hole under the jack carrier.

IMG_4593.webp
______________________________
 
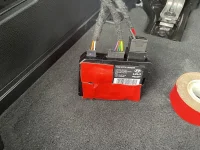
Connect all the wiring up. The first part is to connect the white connector to the vehicle side connector in the jack compartment. Then there are two additional connectors that tie into that pigtail.

IMG_4594.webp

Now we have to attach a ground. I chose a 12mm bolt that's hidden behind the D-Pillar trim piece. Remove that bolt, sand down the paint around that bolt hole (to allow for a better ground connection), and reinstall the bolt with the grounding loop from the wiring harness. It was hard to get a picture of this, but I used the bolt shown below.

IMG_4598.webp
 
Now let's reinstall everything and get the wiring secured. I used double sided tape on the back of the trailer harness and fixed it to the wall behind the D-pillar trim piece. Make sure it's out of the way of the jack! Then zip-tie up all the wiring above and below and reinstall the trim pieces.

IMG_4600.webp

IMG_4603.webp

IMG_4604.webp
 
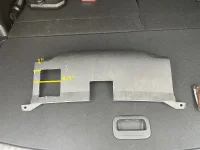
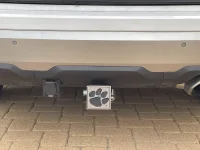
Last but not least - make the cutout for the wiring in the rear bumper trailer hitch trim panel. Based on where I mounted things - I cut a hole in the panel as shown below. The final install pics are also shown. It's not nearly as clean as the factory - but I think it looks pretty darned clean given that there is no factory solution right now.

IMG_4605.webp

IMG_4606.webp

IMG_4608.webp

Happy Trailering!
 
One final step, take that letter from Kia saying they had no OEM solution, drive to the dealer that didn’t want to help you with trailer in tow, slap the letter on their window while pointing at your OEM tow option and say:
1685657222614.gif
______________________________
 
Just curious why Kia or Hyundai America does not sell the harness in the states, do we have different safety regulations or does the harness still pose a fire threat and it can’t get approved here. Just worried it has the same issues as last years, as I don’t know that Kia or Hyundai know what caused the previous years problem as people were told to take out the fuse until a remedy is found.
 
Just curious why Kia or Hyundai America does not sell the harness in the states, do we have different safety regulations or does the harness still pose a fire threat and it can’t get approved here. Just worried it has the same issues as last years, as I don’t know that Kia or Hyundai know what caused the previous years problem as people were told to take out the fuse until a remedy is found.
I doubt very seriously that this harness will have any similar failures to the old harness. First off, this harness uses a microcomputer to decode the CAN bus signals (not just passive fuses and relays as the previous generation) and secondly, there are two separate fuses built right into the harness. You can see them in the photo where I'm connecting things up to the car.

As to why they don't sell this in the USA yet - no clue.
 
Thanks just curious, previously installed a curt and power from the power near the Jack area and store everything zip tied in the Jack compartment. Don’t tow my boat very often and only in the summer months, so just trying to figure out if I should order one, but thanks for the reply
 
Step 4 is to remove the the jack tools and jack from the jack compartment.

Step 5 is to remove the two trip clips that hold the jack foam into place. These are highlighted below. These clips are fairly difficult to remove, but they do just pull straight up and off.

View attachment 30649
Push pin pliers make these clips easy to remove. Depending on how much you work on your own vehicle I recommend getting some. Thank you for the in depth installation steps you have gone above and beyond and that is awesome.
______________________________
 
Great writeup! Hopefully the dealers offer installations soon!
 
@tyger23 where you able to locate the in cabin connector for a wired electronic brake controller on your 2023?
 
Great writeup! Hopefully the dealers offer installations soon!
If they do, count on that being $500-1000 just for the harness and there is no way they are doing any custom fabrication.
 
i'm hoping Kia's has the other parts ready to go and were just waiting on the wiring harness... we'll see...


Back
Top