reigndeerz
Active member
- Joined
- May 25, 2020
- Messages
- 46
- Reaction score
- 126
- Points
- 33
Just completed LED upgrades across all the lights on my S Trim and confirmed that it all functions without error codes and hyperflash.
tl;dr
- Front lights changed includes 1) Headlamps, 2) Turn Signal, 3) Side Marker
- Rear lights changed includes: 4) License Plate, 5) Back Up / Reverse, 6) Tail, 7) Brakes, 8) Side Marker, 9) Rear Turn Signal
- Total cost was just over $200, and about 2 to 2.5 hours of work (excluding failure to find the right bulbs)
- On hindsight, I would have not done the side markers (little visual difference) and the rear turn signal (really difficult to install)
Thought I'd document my entire journey here to make it easy for others who might want to embark on a similar journey. Each section includes:
a) LED Bulb Purchased + Cost
b) Ease of Installation
c) Installation Guide
d) My Personal Take
e) Before / After Image
----------------------
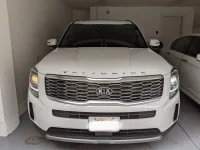
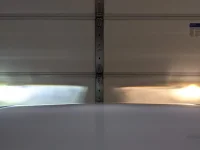
1. Headlamps
a) LED Used: 9005 LASFIT headlights from Amazon ($54.99)
b) Ease of Installation: 5-10 mins
c) Installation Guide: LASFIT YouTube
d) Hot Take: No issue with hyperflash or error codes, would def start with this install as it gives the greatest bang for your buck (visually and ease of installation)
e) Left - Original Halogen, Right - LED
2. Front Turn Signal
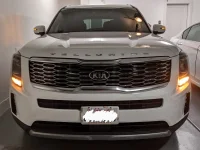
a) LED Used: 1157-A Everbright from Amazon ($16.99); H/T: Cacalon on this forum
b) Ease of Installation: 10-15 mins
c) Installation Guide: LASFIT YouTube
d) Hot Take: Use an adjustable wrench to get leverage to twist out the housing
e) Left - Original Halogen, Right - LED
3. Front Side Marker
a) LED Used: 194 LASFIT from Amazon ($10.94)
b) Ease of Installation: 10-15 mins
c) Installation Guide: H/T Jazzyone
d) Hot Take: Lowest bang for the buck with very limited visual difference (hence the lack of photos)
4. License Plate
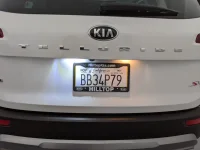
a) LED Used: 194 LASFIT from Amazon ($8.89)
b) Ease of Installation: 5 mins
c) Installation Guide: LASFIT YouTube
d) Hot Take: Easiest installation
e) Left - LED, Right - Original Halogen
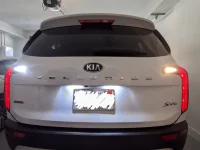
5. Backup / Reverse
a) LED Used: 912 Auxito from Amazon ($13.99)
b) Ease of Installation: 20-25 mins
c) Installation Guide: LASFIT YouTube
d) Hot Take: It looks more intimidating than it actually is. The visual difference does justify the work required, imo
e) Left - LED, Right - Original Halogen
6. Tail
a) LED Used: 1157-R 2 sets of Oxilam on Amazon ($16.99 per set)
b) Ease of Installation: 10-15 mins
c) Installation Guide: H/T itsal
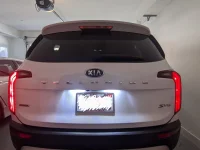
d) Hot Take: Tail lights were easy to change out as part of the "Tail Lamp Assembly" that includes the next 2 lights (Brake and Rear Marker).
e) Left - LED, Right - Original Halogen
7. Brake
a) LED Used: 1157-R LASFIT on Amazon ($45.95); Tried ~10 different bulbs on Amazon in the <$20 price range and every single one of them triggered an error code. LEDs tested and failed includes: Oxilam (linked above), 1797, Vehicode, Alla, Phinlion, Auxlight, Auxito, iBrightstar, Luyed, Katur)
b) Ease of Installation: (included in Tail lamp install); Caveat that finding a bulb that worked without triggering error codes was the single most difficult part of replacing this light and took me a full month of back and forth.
c) Installation Guide: H/T itsal
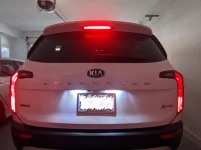
d) Hot Take: Invest in a CANBUS / Error Free bulb as this was the most problematic bulb by far. Luckily this was by far the easiest bulb to swap in and out to test!
e) Left - LED, Right - Original Halogen
8. Rear Marker
a) LED Used: 194 LASFIT on Amazon ($10.94)
b) Ease of Installation: (included in Tail lamp install)
c) Installation Guide: H/T itsal
d) Hot Take: Similar to Front Marker, the visual difference is minimal and you'd be swapping out for completeness sake, not for any actual benefits.
9. Rear Turn Signal
a) LED Used: 1157-R Oxilam on Amazon ($16.99)
b) Ease of Installation: 45-60 mins. By far the most difficult to switch out.
c) Installation Guide: H/T firedawg
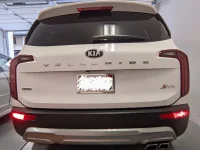
d) Hot Take: This was REALLY difficult to install and had to be done almost entirely by touch and feel. The screws you have to remove to access the driver side lights are really difficult to remove. I personally would not have done it if not for the time I had already invested and my OCD to complete the project. Use a adjustable wrench to get some leverage to turn the housing, and leave this for last to get familiar with how to install 1157 bulbs by practicing on the other bulbs. I'd also consider installing each bulb in a separate session to avoid driving yourself crazy!
e) Left - LED, Right - Original Halogen
tl;dr
- Front lights changed includes 1) Headlamps, 2) Turn Signal, 3) Side Marker
- Rear lights changed includes: 4) License Plate, 5) Back Up / Reverse, 6) Tail, 7) Brakes, 8) Side Marker, 9) Rear Turn Signal
- Total cost was just over $200, and about 2 to 2.5 hours of work (excluding failure to find the right bulbs)
- On hindsight, I would have not done the side markers (little visual difference) and the rear turn signal (really difficult to install)
Thought I'd document my entire journey here to make it easy for others who might want to embark on a similar journey. Each section includes:
a) LED Bulb Purchased + Cost
b) Ease of Installation
c) Installation Guide
d) My Personal Take
e) Before / After Image
----------------------
1. Headlamps
a) LED Used: 9005 LASFIT headlights from Amazon ($54.99)
b) Ease of Installation: 5-10 mins
c) Installation Guide: LASFIT YouTube
d) Hot Take: No issue with hyperflash or error codes, would def start with this install as it gives the greatest bang for your buck (visually and ease of installation)
e) Left - Original Halogen, Right - LED


2. Front Turn Signal
a) LED Used: 1157-A Everbright from Amazon ($16.99); H/T: Cacalon on this forum
b) Ease of Installation: 10-15 mins
c) Installation Guide: LASFIT YouTube
d) Hot Take: Use an adjustable wrench to get leverage to twist out the housing
e) Left - Original Halogen, Right - LED

3. Front Side Marker
a) LED Used: 194 LASFIT from Amazon ($10.94)
b) Ease of Installation: 10-15 mins
c) Installation Guide: H/T Jazzyone
d) Hot Take: Lowest bang for the buck with very limited visual difference (hence the lack of photos)
4. License Plate
a) LED Used: 194 LASFIT from Amazon ($8.89)
b) Ease of Installation: 5 mins
c) Installation Guide: LASFIT YouTube
d) Hot Take: Easiest installation
e) Left - LED, Right - Original Halogen

5. Backup / Reverse
a) LED Used: 912 Auxito from Amazon ($13.99)
b) Ease of Installation: 20-25 mins
c) Installation Guide: LASFIT YouTube
d) Hot Take: It looks more intimidating than it actually is. The visual difference does justify the work required, imo
e) Left - LED, Right - Original Halogen

6. Tail
a) LED Used: 1157-R 2 sets of Oxilam on Amazon ($16.99 per set)
b) Ease of Installation: 10-15 mins
c) Installation Guide: H/T itsal
d) Hot Take: Tail lights were easy to change out as part of the "Tail Lamp Assembly" that includes the next 2 lights (Brake and Rear Marker).
e) Left - LED, Right - Original Halogen

7. Brake
a) LED Used: 1157-R LASFIT on Amazon ($45.95); Tried ~10 different bulbs on Amazon in the <$20 price range and every single one of them triggered an error code. LEDs tested and failed includes: Oxilam (linked above), 1797, Vehicode, Alla, Phinlion, Auxlight, Auxito, iBrightstar, Luyed, Katur)
b) Ease of Installation: (included in Tail lamp install); Caveat that finding a bulb that worked without triggering error codes was the single most difficult part of replacing this light and took me a full month of back and forth.
c) Installation Guide: H/T itsal
d) Hot Take: Invest in a CANBUS / Error Free bulb as this was the most problematic bulb by far. Luckily this was by far the easiest bulb to swap in and out to test!
e) Left - LED, Right - Original Halogen

8. Rear Marker
a) LED Used: 194 LASFIT on Amazon ($10.94)
b) Ease of Installation: (included in Tail lamp install)
c) Installation Guide: H/T itsal
d) Hot Take: Similar to Front Marker, the visual difference is minimal and you'd be swapping out for completeness sake, not for any actual benefits.
9. Rear Turn Signal
a) LED Used: 1157-R Oxilam on Amazon ($16.99)
b) Ease of Installation: 45-60 mins. By far the most difficult to switch out.
c) Installation Guide: H/T firedawg
d) Hot Take: This was REALLY difficult to install and had to be done almost entirely by touch and feel. The screws you have to remove to access the driver side lights are really difficult to remove. I personally would not have done it if not for the time I had already invested and my OCD to complete the project. Use a adjustable wrench to get some leverage to turn the housing, and leave this for last to get familiar with how to install 1157 bulbs by practicing on the other bulbs. I'd also consider installing each bulb in a separate session to avoid driving yourself crazy!
e) Left - LED, Right - Original Halogen

Last edited:


