rayyan29m
New member
- Joined
- Jan 31, 2021
- Messages
- 3
- Reaction score
- 1
- Points
- 3
Hi,Electrically sounds like you have the same setup as Canada. Meaning you have the LED tail/brake vertical lamps, but still have the halogen turn signals in the rear bumper? Only exception being you have a partially clear lens with an amber bulb.
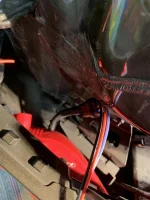
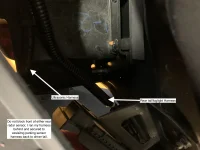
Personally I like the utilization of the lights in the bumper, if it were mine I would just replace with a red or amber LED to get a cleaner look. I have the combination lamps in the US market where the tail/brake AND turn signal is on the LED vertical tail lamp. Originally the bumper had only reflectors in mine (standard for EX/SX trims in the US). I have since made my bumper lights function as rear fog lights. The third pic is the reflectors I removed and have since sold.
View attachment 8307View attachment 8308View attachment 8309View attachment 8310
Can you share some pictures or on how to remove the rear bumper and replace the reflector or light on the bumper please. Thanks