• Hint: Use a descriptive title for your new message
    If you're looking for help and want to draw people in who can assist you, use a descriptive subject title when posting your message. In other words, "I need help with my SUV" could be about anything and can easily be overlooked by people who can help. However, "I need help with my transmission" will draw interest from people who can help with a transmission specific issue. Be as descriptive as you can. Please also post in the appropriate forum. The "Lounge" is for introducing yourself. If you need help with your leather interior, please post in the Interior section - and so on... This message can be closed by clicking the X in the top right corner.
  • Car enthusiast? Join us on Cars Connected! iOS | Android | Desktop

Comprehensive LED Upgrade Guide with Photos

🤖 AI Summary

No AI summary has been generated for this thread yet.
Anyone found a suitable LED bulb for the 2022 yet?

I suppose HID mod is an option.
I have tried searching and how come I can't find anywhere with a list of what bulbs come on the 2022? I have a 2022 SX Nightfall on order and am confused as to which bulbs i should get stocked up on for switching out? It says it comes with LED headlights, so just curious if anyone knows why i would want or what the differences would be to the stock LED to the LasFit ones mentioned in the thread. New here, and to forums, so sry if im not replying or typing to the right 'mention'.
 
Just completed LED upgrades across all the lights on my S Trim and confirmed that it all functions without error codes and hyperflash.

tl;dr
- Front lights changed includes 1) Headlamps, 2) Turn Signal, 3) Side Marker
- Rear lights changed includes: 4) License Plate, 5) Back Up / Reverse, 6) Tail, 7) Brakes, 8) Side Marker, 9) Rear Turn Signal
- Total cost was just over $200, and about 2 to 2.5 hours of work (excluding failure to find the right bulbs)
- On hindsight, I would have not done the side markers (little visual difference) and the rear turn signal (really difficult to install)

Thought I'd document my entire journey here to make it easy for others who might want to embark on a similar journey. Each section includes:
a) LED Bulb Purchased + Cost
b) Ease of Installation
c) Installation Guide
d) My Personal Take
e) Before / After Image

----------------------

1. Headlamps
a) LED Used: 9005 LASFIT headlights from Amazon ($54.99)
b) Ease of Installation: 5-10 mins
c) Installation Guide: LASFIT YouTube
d) Hot Take: No issue with hyperflash or error codes, would def start with this install as it gives the greatest bang for your buck (visually and ease of installation)
e) Left - Original Halogen, Right - LED

View attachment 13006View attachment 13007

2. Front Turn Signal
a) LED Used: 1157-A Everbright from Amazon ($16.99); H/T: Cacalon on this forum
b) Ease of Installation: 10-15 mins
c) Installation Guide: LASFIT YouTube
d) Hot Take: Use an adjustable wrench to get leverage to twist out the housing
e) Left - Original Halogen, Right - LED

View attachment 13008

3. Front Side Marker
a) LED Used: 194 LASFIT from Amazon ($10.94)
b) Ease of Installation: 10-15 mins
c) Installation Guide: H/T Jazzyone
d) Hot Take: Lowest bang for the buck with very limited visual difference (hence the lack of photos)

4. License Plate
a) LED Used: 194 LASFIT from Amazon ($8.89)
b) Ease of Installation: 5 mins
c) Installation Guide: LASFIT YouTube
d) Hot Take: Easiest installation
e) Left - LED, Right - Original Halogen

View attachment 13011

5. Backup / Reverse
a) LED Used: 912 Auxito from Amazon ($13.99)
b) Ease of Installation: 20-25 mins
c) Installation Guide: LASFIT YouTube
d) Hot Take: It looks more intimidating than it actually is. The visual difference does justify the work required, imo
e) Left - LED, Right - Original Halogen

View attachment 13012

6. Tail
a) LED Used: 1157-R 2 sets of Oxilam on Amazon ($16.99 per set)
b) Ease of Installation: 10-15 mins
c) Installation Guide: H/T itsal
d) Hot Take: Tail lights were easy to change out as part of the "Tail Lamp Assembly" that includes the next 2 lights (Brake and Rear Marker).
e) Left - LED, Right - Original Halogen

View attachment 13014

7. Brake
a) LED Used: 1157-R LASFIT on Amazon ($45.95); Tried ~10 different bulbs on Amazon in the <$20 price range and every single one of them triggered an error code. LEDs tested and failed includes: Oxilam (linked above), 1797, Vehicode, Alla, Phinlion, Auxlight, Auxito, iBrightstar, Luyed, Katur)
b) Ease of Installation: (included in Tail lamp install); Caveat that finding a bulb that worked without triggering error codes was the single most difficult part of replacing this light and took me a full month of back and forth.
c) Installation Guide: H/T itsal
d) Hot Take: Invest in a CANBUS / Error Free bulb as this was the most problematic bulb by far. Luckily this was by far the easiest bulb to swap in and out to test!
e) Left - LED, Right - Original Halogen

View attachment 13015

8. Rear Marker
a) LED Used: 194 LASFIT on Amazon ($10.94)
b) Ease of Installation: (included in Tail lamp install)
c) Installation Guide: H/T itsal
d) Hot Take: Similar to Front Marker, the visual difference is minimal and you'd be swapping out for completeness sake, not for any actual benefits.

9. Rear Turn Signal
a) LED Used: 1157-R Oxilam on Amazon ($16.99)
b) Ease of Installation: 45-60 mins. By far the most difficult to switch out.
c) Installation Guide: H/T firedawg
d) Hot Take: This was REALLY difficult to install and had to be done almost entirely by touch and feel. The screws you have to remove to access the driver side lights are really difficult to remove. I personally would not have done it if not for the time I had already invested and my OCD to complete the project. Use a adjustable wrench to get some leverage to turn the housing, and leave this for last to get familiar with how to install 1157 bulbs by practicing on the other bulbs. I'd also consider installing each bulb in a separate session to avoid driving yourself crazy!
e) Left - LED, Right - Original Halogen

View attachment 13016
Awesomw job! Congratulations it looks great, and it was great how you documented everything, it will save some folks here a lot of work and frustration!
 
Just completed LED upgrades across all the lights on my S Trim and confirmed that it all functions without error codes and hyperflash.

tl;dr
- Front lights changed includes 1) Headlamps, 2) Turn Signal, 3) Side Marker
- Rear lights changed includes: 4) License Plate, 5) Back Up / Reverse, 6) Tail, 7) Brakes, 8) Side Marker, 9) Rear Turn Signal
- Total cost was just over $200, and about 2 to 2.5 hours of work (excluding failure to find the right bulbs)
- On hindsight, I would have not done the side markers (little visual difference) and the rear turn signal (really difficult to install)

Thought I'd document my entire journey here to make it easy for others who might want to embark on a similar journey. Each section includes:
a) LED Bulb Purchased + Cost
b) Ease of Installation
c) Installation Guide
d) My Personal Take
e) Before / After Image

----------------------

1. Headlamps
a) LED Used: 9005 LASFIT headlights from Amazon ($54.99)
b) Ease of Installation: 5-10 mins
c) Installation Guide: LASFIT YouTube
d) Hot Take: No issue with hyperflash or error codes, would def start with this install as it gives the greatest bang for your buck (visually and ease of installation)
e) Left - Original Halogen, Right - LED

View attachment 13006View attachment 13007

2. Front Turn Signal
a) LED Used: 1157-A Everbright from Amazon ($16.99); H/T: Cacalon on this forum
b) Ease of Installation: 10-15 mins
c) Installation Guide: LASFIT YouTube
d) Hot Take: Use an adjustable wrench to get leverage to twist out the housing
e) Left - Original Halogen, Right - LED

View attachment 13008

3. Front Side Marker
a) LED Used: 194 LASFIT from Amazon ($10.94)
b) Ease of Installation: 10-15 mins
c) Installation Guide: H/T Jazzyone
d) Hot Take: Lowest bang for the buck with very limited visual difference (hence the lack of photos)

4. License Plate
a) LED Used: 194 LASFIT from Amazon ($8.89)
b) Ease of Installation: 5 mins
c) Installation Guide: LASFIT YouTube
d) Hot Take: Easiest installation
e) Left - LED, Right - Original Halogen

View attachment 13011

5. Backup / Reverse
a) LED Used: 912 Auxito from Amazon ($13.99)
b) Ease of Installation: 20-25 mins
c) Installation Guide: LASFIT YouTube
d) Hot Take: It looks more intimidating than it actually is. The visual difference does justify the work required, imo
e) Left - LED, Right - Original Halogen

View attachment 13012

6. Tail
a) LED Used: 1157-R 2 sets of Oxilam on Amazon ($16.99 per set)
b) Ease of Installation: 10-15 mins
c) Installation Guide: H/T itsal
d) Hot Take: Tail lights were easy to change out as part of the "Tail Lamp Assembly" that includes the next 2 lights (Brake and Rear Marker).
e) Left - LED, Right - Original Halogen

View attachment 13014

7. Brake
a) LED Used: 1157-R LASFIT on Amazon ($45.95); Tried ~10 different bulbs on Amazon in the <$20 price range and every single one of them triggered an error code. LEDs tested and failed includes: Oxilam (linked above), 1797, Vehicode, Alla, Phinlion, Auxlight, Auxito, iBrightstar, Luyed, Katur)
b) Ease of Installation: (included in Tail lamp install); Caveat that finding a bulb that worked without triggering error codes was the single most difficult part of replacing this light and took me a full month of back and forth.
c) Installation Guide: H/T itsal
d) Hot Take: Invest in a CANBUS / Error Free bulb as this was the most problematic bulb by far. Luckily this was by far the easiest bulb to swap in and out to test!
e) Left - LED, Right - Original Halogen

View attachment 13015

8. Rear Marker
a) LED Used: 194 LASFIT on Amazon ($10.94)
b) Ease of Installation: (included in Tail lamp install)
c) Installation Guide: H/T itsal
d) Hot Take: Similar to Front Marker, the visual difference is minimal and you'd be swapping out for completeness sake, not for any actual benefits.

9. Rear Turn Signal
a) LED Used: 1157-R Oxilam on Amazon ($16.99)
b) Ease of Installation: 45-60 mins. By far the most difficult to switch out.
c) Installation Guide: H/T firedawg
d) Hot Take: This was REALLY difficult to install and had to be done almost entirely by touch and feel. The screws you have to remove to access the driver side lights are really difficult to remove. I personally would not have done it if not for the time I had already invested and my OCD to complete the project. Use a adjustable wrench to get some leverage to turn the housing, and leave this for last to get familiar with how to install 1157 bulbs by practicing on the other bulbs. I'd also consider installing each bulb in a separate session to avoid driving yourself crazy!
e) Left - LED, Right - Original Halogen

View attachment 13016
Any issues with hyper flashing or the need for resistors ?
Well done on the write up , this will help alot of people 👏.
 
I have tried searching and how come I can't find anywhere with a list of what bulbs come on the 2022? I have a 2022 SX Nightfall on order and am confused as to which bulbs i should get stocked up on for switching out? It says it comes with LED headlights, so just curious if anyone knows why i would want or what the differences would be to the stock LED to the LasFit ones mentioned in the thread. New here, and to forums, so sry if im not replying or typing to the right 'mention'.
You will already have factory LEDs with the SX. The folks on here switching/upgrading are going from Halogens to LEDs. You won't need to do that.
______________________________
 
Just completed LED upgrades across all the lights on my S Trim and confirmed that it all functions without error codes and hyperflash.

tl;dr
- Front lights changed includes 1) Headlamps, 2) Turn Signal, 3) Side Marker
- Rear lights changed includes: 4) License Plate, 5) Back Up / Reverse, 6) Tail, 7) Brakes, 8) Side Marker, 9) Rear Turn Signal
- Total cost was just over $200, and about 2 to 2.5 hours of work (excluding failure to find the right bulbs)
- On hindsight, I would have not done the side markers (little visual difference) and the rear turn signal (really difficult to install)

Thought I'd document my entire journey here to make it easy for others who might want to embark on a similar journey. Each section includes:
a) LED Bulb Purchased + Cost
b) Ease of Installation
c) Installation Guide
d) My Personal Take
e) Before / After Image

----------------------

1. Headlamps
a) LED Used: 9005 LASFIT headlights from Amazon ($54.99)
b) Ease of Installation: 5-10 mins
c) Installation Guide: LASFIT YouTube
d) Hot Take: No issue with hyperflash or error codes, would def start with this install as it gives the greatest bang for your buck (visually and ease of installation)
e) Left - Original Halogen, Right - LED

View attachment 13006View attachment 13007

2. Front Turn Signal
a) LED Used: 1157-A Everbright from Amazon ($16.99); H/T: Cacalon on this forum
b) Ease of Installation: 10-15 mins
c) Installation Guide: LASFIT YouTube
d) Hot Take: Use an adjustable wrench to get leverage to twist out the housing
e) Left - Original Halogen, Right - LED

View attachment 13008

3. Front Side Marker
a) LED Used: 194 LASFIT from Amazon ($10.94)
b) Ease of Installation: 10-15 mins
c) Installation Guide: H/T Jazzyone
d) Hot Take: Lowest bang for the buck with very limited visual difference (hence the lack of photos)

4. License Plate
a) LED Used: 194 LASFIT from Amazon ($8.89)
b) Ease of Installation: 5 mins
c) Installation Guide: LASFIT YouTube
d) Hot Take: Easiest installation
e) Left - LED, Right - Original Halogen

View attachment 13011

5. Backup / Reverse
a) LED Used: 912 Auxito from Amazon ($13.99)
b) Ease of Installation: 20-25 mins
c) Installation Guide: LASFIT YouTube
d) Hot Take: It looks more intimidating than it actually is. The visual difference does justify the work required, imo
e) Left - LED, Right - Original Halogen

View attachment 13012

6. Tail
a) LED Used: 1157-R 2 sets of Oxilam on Amazon ($16.99 per set)
b) Ease of Installation: 10-15 mins
c) Installation Guide: H/T itsal
d) Hot Take: Tail lights were easy to change out as part of the "Tail Lamp Assembly" that includes the next 2 lights (Brake and Rear Marker).
e) Left - LED, Right - Original Halogen

View attachment 13014

7. Brake
a) LED Used: 1157-R LASFIT on Amazon ($45.95); Tried ~10 different bulbs on Amazon in the <$20 price range and every single one of them triggered an error code. LEDs tested and failed includes: Oxilam (linked above), 1797, Vehicode, Alla, Phinlion, Auxlight, Auxito, iBrightstar, Luyed, Katur)
b) Ease of Installation: (included in Tail lamp install); Caveat that finding a bulb that worked without triggering error codes was the single most difficult part of replacing this light and took me a full month of back and forth.
c) Installation Guide: H/T itsal
d) Hot Take: Invest in a CANBUS / Error Free bulb as this was the most problematic bulb by far. Luckily this was by far the easiest bulb to swap in and out to test!
e) Left - LED, Right - Original Halogen

View attachment 13015

8. Rear Marker
a) LED Used: 194 LASFIT on Amazon ($10.94)
b) Ease of Installation: (included in Tail lamp install)
c) Installation Guide: H/T itsal
d) Hot Take: Similar to Front Marker, the visual difference is minimal and you'd be swapping out for completeness sake, not for any actual benefits.

9. Rear Turn Signal
a) LED Used: 1157-R Oxilam on Amazon ($16.99)
b) Ease of Installation: 45-60 mins. By far the most difficult to switch out.
c) Installation Guide: H/T firedawg
d) Hot Take: This was REALLY difficult to install and had to be done almost entirely by touch and feel. The screws you have to remove to access the driver side lights are really difficult to remove. I personally would not have done it if not for the time I had already invested and my OCD to complete the project. Use a adjustable wrench to get some leverage to turn the housing, and leave this for last to get familiar with how to install 1157 bulbs by practicing on the other bulbs. I'd also consider installing each bulb in a separate session to avoid driving yourself crazy!
e) Left - LED, Right - Original Halogen

View attachment 13016
Awesome write up!! Question...why did you use two different bulbs for the Tail lights when they're all 3 the same...p21 5v? When looking at the back of the housing, which bulbs go in which spot? You have the top, middle, the peanut bulb but that's self explanatory and then the bottom bulb. The top two have an orange bulb socket and the bottom one has a dark gray socket. Am I correct that you the lasfit for the bottom bulb and the oxilam for the top two??

Thanks in advance,
Kevin
 
Thanks, I actually just installed the new Lasfit LC plus on my ‘22 tonight. They look awesome. Noticeable improvement over the halogens both in complete dark and roads with ambient lighting. Spent $40 and 10 mins to install, 30 mins driving around checking them out. Hopefully they hold up.
What bulbs did you use for your 22? I am getting ready to swap and want to make sure I get ones that have worked. Any issues so far?
 
What bulbs did you use for your 22? I am getting ready to swap and want to make sure I get ones that have worked. Any issues so far?
I used these :
Amazon.com
No issues whatsoever and I found them to be a big improvement from the halogens.
 
I just got my 22 Telluride S in yesterday and went to work on the lighting today. I can confirm that Lucas Lighting L2 Led headlight bulb replacements work correctly with no Hyper flash issues and no need to remove the desiccant packet that is on the back cap of the headlight housing. Everything fits inside with no mods.

I can also confirm, unfortunately, that their L-1157sb that are supposed to replace the turn signals and give you white daytime running lights and amber turn signals when engaged do not work. The DLR portion didn't work at all, then hyper flash when engaging the turn signals and the Kia complained with a warning message to check the turn signals.

Maybe I did something wrong but you basically pull the old bulb and put in the new so not much to screw up.?! Not sure if anything can be added to make them work, or if there is just a better alternative.

I also went to put in the led license plate bulbs, the L-T10, and one worked great, the other was dead. Not sure if they will send a replacement, I ordered all these lights back in early January a few days after I ordered the car and I just became the owner yesterday so many months have passed. I emailed Lucas to see how they will handle it.

Also put in the Husky fitted trunk liner for the 3rd row down config and it fits like a glove and put on Bosch evolution wipers on the fronts, the bosh icon 13 didn't install correctly on the rear, didn't seem to be the right connector, but again, might have over looked something. Seems like I would have had to snap off this plastic thing that was in the way of getting the blade to go on correctly.

Slowly but surely will get all eh aftermarket stuff on the new car. Loving it so far in this first 24 hours of ownership.! We will see if that fades or stays ;)
______________________________
 
I have tried searching and how come I can't find anywhere with a list of what bulbs come on the 2022? I have a 2022 SX Nightfall on order and am confused as to which bulbs i should get stocked up on for switching out? It says it comes with LED headlights, so just curious if anyone knows why i would want or what the differences would be to the stock LED to the LasFit ones mentioned in the thread. New here, and to forums, so sry if im not replying or typing to the right 'mention'.
I think others addressed your question but the SX comes with all LED’s except the license plate lights and reverse lights. For my 22’ SXP NF/T, I upgraded those to LED bulbs for a complete LED package for the rig. Others who got a lower trim level did not get all LED’s throughout and therefore are upgrading themselves to LED bulbs.

I thought about buying my bulbs from Amazon or going less expensive but for a 50k vehicle, I wanted to make sure I got a name brand at my local Auto Zone and spent $50 total. I think it was worth it for the license plate lights which are actually brighter and nice looking but the reverse doesn’t seem much brighter only looks nicer, more crisp light.
Where did you get a 22' SXP NF/T for only 50k...??? Ha, paid more than that for an S down here, and that was the "cheap" price in Florida.!
 
Where did you get a 22' SXP NF/T for only 50k...??? Ha, paid more than that for an S down here, and that was the "cheap" price in Florida.!
Eastern Washington. I made sure I paid MSRP, and well I actually paid 55K and change with taxes and licensing. But nonetheless, I got an 22’ SXP NF/T in Gravity Grey at MSRP. I contacted several dealers throughout WA and all had crazy markups. From what I gathered on this forum over the last year, it isn’t easy finding MSRP but I happen to have a local dealer offering it. Although I did also wait 9 months…so there‘s that.
 
Where did you get a 22' SXP NF/T for only 50k...??? Ha, paid more than that for an S down here, and that was the "cheap" price in Florida.!
51k is the going msrp for sx-p n/t . There are quite a few dealers around the country selling at msrp as long as your willing to wait 4-10 months+ for it to come in. I got my sx with nightfall for 48k. About a 6.5 month wait. But worth it to save on a 10,000 mark up.
______________________________
 
51k is the going msrp for sx-p n/t . There are quite a few dealers around the country selling at msrp as long as your willing to wait 4-10 months+ for it to come in. I got my sx with nightfall for 48k. About a 6.5 month wait. But worth it to save on a 10,000 mark up.
That's unbelievable.! My S with AWD - tow hitch - sidesteps was 48 and change with a 3 month wait and then added the extended 10yr bumper to bumper and came to just under 52k.! Every dealer I called that said no charge over msrp ended up being 5 to 7k over msrp but they said it wasn't over msrp because they were adding required features I didn't want. And charging 7k for 2k worth of stuff. Ha, figured I am done with the BS and just went with the cheapest place that was honest about the price gouging...

I feel bad for a buddy of mine, he ordered his SX 3 month before me, still doesn't even have an eta, and got it from a dealership hat claims nothing over msrp, but he will find out if it ever arrives. He actually said yesterday he is probably going to go to a different brand after all this. Sucks for him, the car is def worth the wait and even the Markup up to a degree.... :)
 
Thanks for the guide and the recommendations! I replaced my headlights and license plate lights on my 2021 EX yesterday. I bought the brake lights also but didn’t get around to those. Can anyone provide a link to the tail lamp assembly guide? I found a video on YouTube that kind of explains it but want to make sure.
 
That's unbelievable.! My S with AWD - tow hitch - sidesteps was 48 and change with a 3 month wait and then added the extended 10yr bumper to bumper and came to just under 52k.! Every dealer I called that said no charge over msrp ended up being 5 to 7k over msrp but they said it wasn't over msrp because they were adding required features I didn't want. And charging 7k for 2k worth of stuff. Ha, figured I am done with the BS and just went with the cheapest place that was honest about the price gouging...

I feel bad for a buddy of mine, he ordered his SX 3 month before me, still doesn't even have an eta, and got it from a dealership hat claims nothing over msrp, but he will find out if it ever arrives. He actually said yesterday he is probably going to go to a different brand after all this. Sucks for him, the car is def worth the wait and even the Markup up to a degree.... :)
WHAT?! An S for $52K?! And you actually PAID that?! Holy Michael Jordan! My EX was $39, and it was only a few months ago.
 
Thanks for the guide and the recommendations! I replaced my headlights and license plate lights on my 2021 EX yesterday. I bought the brake lights also but didn’t get around to those. Can anyo

Thanks for the guide and the recommendations! I replaced my headlights and license plate lights on my 2021 EX yesterday. I bought the brake lights also but didn’t get around to those. Can anyone provide a link to the tail lamp assembly guide? I found a video on YouTube that kind of explains it but want to make sure.
With the EX, you should not have to change out the brake lights. They are already led.
______________________________
 
WHAT?! An S for $52K?! And you actually PAID that?! Holy Michael Jordan! My EX was $39, and it was only a few months ago.
Holy Michael Jordan, dont know why this still has me laughing
 
Holy Michael Jordan, dont know why this still has me laughing
WHAT?! An S for $52K?! And you actually PAID that?! Holy Michael Jordan! My EX was $39, and it was only a few months ago.
Lucky you, Florida is $999 dealer doc fees, $3144 "market adjustment", cheapest in the sate out of the 15 in state dealerships I contacted and 5 out of state I contacted, AWD+Trailer hitch+ sidesteps added another $3500( the side steps were an after thought so cost more than adding them during the order), tag transfer fee, sales tax and extended bumper to bumper comes to just under 52k... Now the 5k in after market ad-ons, going to be one pricey S...! ;)
 
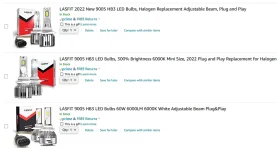
Hi all - just got our 22 S last week and about to buy some to swap - can someone tell me what the difference between all of these lasfit with (seemingly) the same specs is? Don't want anything crazy bright - any current favorites? Thanks!
 

Attachments

  • li.webp
    li.webp
    47.2 KB · Views: 14
Hi all - just got our 22 S last week and about to buy some to swap - can someone tell me what the difference between all of these lasfit with (seemingly) the same specs is? Don't want anything crazy bright - any current favorites? Thanks!
I would look at those pages and check to see what the product codes are. Somewhere on the page will be something like this.

Manufacturer Part Number
‎EX-PLA9005

They might all be the same and just from different sellers that describe them a little differently. I don't remember if it is the Lasfit bulbs but these might be the ones that make you remove the desiccant packet that is in the headlight housing. The Lucas L2's I just put in do not need you to remove them, but they are considerably more than the lasfit.


Back
Top