mrad31
Member
@Tellthemride ah good info, didn’t think they would make that sort of change. If anything I just wish they would add access doors on the hatch for the reverse bulbs like they do on Seltos (and maybe others - just have seen it there)

I've been told that I will need a convertor to change out my headlights on my Telluride S to LED. But it seems that you did not feel that is necessary??Just completed LED upgrades across all the lights on my S Trim and confirmed that it all functions without error codes and hyperflash.
tl;dr
- Front lights changed includes 1) Headlamps, 2) Turn Signal, 3) Side Marker
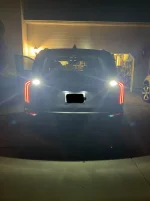
- Rear lights changed includes: 4) License Plate, 5) Back Up / Reverse, 6) Tail, 7) Brakes, 8) Side Marker, 9) Rear Turn Signal
- Total cost was just over $200, and about 2 to 2.5 hours of work (excluding failure to find the right bulbs)
- On hindsight, I would have not done the side markers (little visual difference) and the rear turn signal (really difficult to install)
Thought I'd document my entire journey here to make it easy for others who might want to embark on a similar journey. Each section includes:
a) LED Bulb Purchased + Cost
b) Ease of Installation
c) Installation Guide
d) My Personal Take
e) Before / After Image
----------------------
1. Headlamps
a) LED Used: 9005 LASFIT headlights from Amazon ($54.99)
b) Ease of Installation: 5-10 mins
c) Installation Guide: LASFIT YouTube
d) Hot Take: No issue with hyperflash or error codes, would def start with this install as it gives the greatest bang for your buck (visually and ease of installation)
e) Left - Original Halogen, Right - LED
View attachment 13006View attachment 13007
2. Front Turn Signal
a) LED Used: 1157-A Everbright from Amazon ($16.99); H/T: Cacalon on this forum
b) Ease of Installation: 10-15 mins
c) Installation Guide: LASFIT YouTube
d) Hot Take: Use an adjustable wrench to get leverage to twist out the housing
e) Left - Original Halogen, Right - LED
View attachment 13008
3. Front Side Marker
a) LED Used: 194 LASFIT from Amazon ($10.94)
b) Ease of Installation: 10-15 mins
c) Installation Guide: H/T Jazzyone
d) Hot Take: Lowest bang for the buck with very limited visual difference (hence the lack of photos)
4. License Plate
a) LED Used: 194 LASFIT from Amazon ($8.89)
b) Ease of Installation: 5 mins
c) Installation Guide: LASFIT YouTube
d) Hot Take: Easiest installation
e) Left - LED, Right - Original Halogen
View attachment 13011
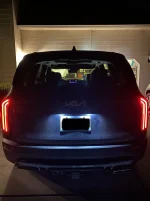
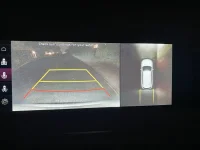
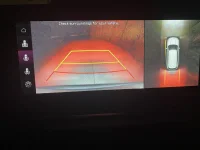
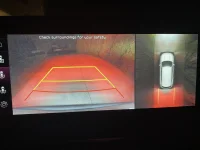
5. Backup / Reverse
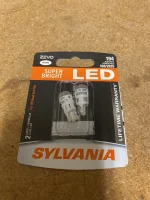
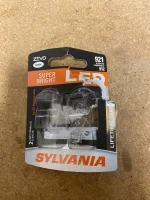
a) LED Used: 912 Auxito from Amazon ($13.99)
b) Ease of Installation: 20-25 mins
c) Installation Guide: LASFIT YouTube
d) Hot Take: It looks more intimidating than it actually is. The visual difference does justify the work required, imo
e) Left - LED, Right - Original Halogen
View attachment 13012
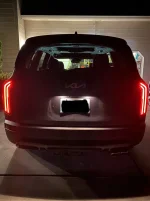
6. Tail
a) LED Used: 1157-R 2 sets of Oxilam on Amazon ($16.99 per set)
b) Ease of Installation: 10-15 mins
c) Installation Guide: H/T itsal
d) Hot Take: Tail lights were easy to change out as part of the "Tail Lamp Assembly" that includes the next 2 lights (Brake and Rear Marker).
e) Left - LED, Right - Original Halogen
View attachment 13014
7. Brake
a) LED Used: 1157-R LASFIT on Amazon ($45.95); Tried ~10 different bulbs on Amazon in the <$20 price range and every single one of them triggered an error code. LEDs tested and failed includes: Oxilam (linked above), 1797, Vehicode, Alla, Phinlion, Auxlight, Auxito, iBrightstar, Luyed, Katur)
b) Ease of Installation: (included in Tail lamp install); Caveat that finding a bulb that worked without triggering error codes was the single most difficult part of replacing this light and took me a full month of back and forth.
c) Installation Guide: H/T itsal
d) Hot Take: Invest in a CANBUS / Error Free bulb as this was the most problematic bulb by far. Luckily this was by far the easiest bulb to swap in and out to test!
e) Left - LED, Right - Original Halogen
View attachment 13015
8. Rear Marker
a) LED Used: 194 LASFIT on Amazon ($10.94)
b) Ease of Installation: (included in Tail lamp install)
c) Installation Guide: H/T itsal
d) Hot Take: Similar to Front Marker, the visual difference is minimal and you'd be swapping out for completeness sake, not for any actual benefits.
9. Rear Turn Signal
a) LED Used: 1157-R Oxilam on Amazon ($16.99)
b) Ease of Installation: 45-60 mins. By far the most difficult to switch out.
c) Installation Guide: H/T firedawg
d) Hot Take: This was REALLY difficult to install and had to be done almost entirely by touch and feel. The screws you have to remove to access the driver side lights are really difficult to remove. I personally would not have done it if not for the time I had already invested and my OCD to complete the project. Use a adjustable wrench to get some leverage to turn the housing, and leave this for last to get familiar with how to install 1157 bulbs by practicing on the other bulbs. I'd also consider installing each bulb in a separate session to avoid driving yourself crazy!
e) Left - LED, Right - Original Halogen
View attachment 13016
Did you get any hyper blink on the side markers? I ordered similar but slightly more pricy LED and I got hyper blink..Just completed LED upgrades across all the lights on my S Trim and confirmed that it all functions without error codes and hyperflash.
tl;dr
- Front lights changed includes 1) Headlamps, 2) Turn Signal, 3) Side Marker
- Rear lights changed includes: 4) License Plate, 5) Back Up / Reverse, 6) Tail, 7) Brakes, 8) Side Marker, 9) Rear Turn Signal
- Total cost was just over $200, and about 2 to 2.5 hours of work (excluding failure to find the right bulbs)
- On hindsight, I would have not done the side markers (little visual difference) and the rear turn signal (really difficult to install)
Thought I'd document my entire journey here to make it easy for others who might want to embark on a similar journey. Each section includes:
a) LED Bulb Purchased + Cost
b) Ease of Installation
c) Installation Guide
d) My Personal Take
e) Before / After Image
----------------------
1. Headlamps
a) LED Used: 9005 LASFIT headlights from Amazon ($54.99)
b) Ease of Installation: 5-10 mins
c) Installation Guide: LASFIT YouTube
d) Hot Take: No issue with hyperflash or error codes, would def start with this install as it gives the greatest bang for your buck (visually and ease of installation)
e) Left - Original Halogen, Right - LED
View attachment 13006View attachment 13007
2. Front Turn Signal
a) LED Used: 1157-A Everbright from Amazon ($16.99); H/T: Cacalon on this forum
b) Ease of Installation: 10-15 mins
c) Installation Guide: LASFIT YouTube
d) Hot Take: Use an adjustable wrench to get leverage to twist out the housing
e) Left - Original Halogen, Right - LED
View attachment 13008
3. Front Side Marker
a) LED Used: 194 LASFIT from Amazon ($10.94)
b) Ease of Installation: 10-15 mins
c) Installation Guide: H/T Jazzyone
d) Hot Take: Lowest bang for the buck with very limited visual difference (hence the lack of photos)
4. License Plate
a) LED Used: 194 LASFIT from Amazon ($8.89)
b) Ease of Installation: 5 mins
c) Installation Guide: LASFIT YouTube
d) Hot Take: Easiest installation
e) Left - LED, Right - Original Halogen
View attachment 13011
5. Backup / Reverse
a) LED Used: 912 Auxito from Amazon ($13.99)
b) Ease of Installation: 20-25 mins
c) Installation Guide: LASFIT YouTube
d) Hot Take: It looks more intimidating than it actually is. The visual difference does justify the work required, imo
e) Left - LED, Right - Original Halogen
View attachment 13012
6. Tail
a) LED Used: 1157-R 2 sets of Oxilam on Amazon ($16.99 per set)
b) Ease of Installation: 10-15 mins
c) Installation Guide: H/T itsal
d) Hot Take: Tail lights were easy to change out as part of the "Tail Lamp Assembly" that includes the next 2 lights (Brake and Rear Marker).
e) Left - LED, Right - Original Halogen
View attachment 13014
7. Brake
a) LED Used: 1157-R LASFIT on Amazon ($45.95); Tried ~10 different bulbs on Amazon in the <$20 price range and every single one of them triggered an error code. LEDs tested and failed includes: Oxilam (linked above), 1797, Vehicode, Alla, Phinlion, Auxlight, Auxito, iBrightstar, Luyed, Katur)
b) Ease of Installation: (included in Tail lamp install); Caveat that finding a bulb that worked without triggering error codes was the single most difficult part of replacing this light and took me a full month of back and forth.
c) Installation Guide: H/T itsal
d) Hot Take: Invest in a CANBUS / Error Free bulb as this was the most problematic bulb by far. Luckily this was by far the easiest bulb to swap in and out to test!
e) Left - LED, Right - Original Halogen
View attachment 13015
8. Rear Marker
a) LED Used: 194 LASFIT on Amazon ($10.94)
b) Ease of Installation: (included in Tail lamp install)
c) Installation Guide: H/T itsal
d) Hot Take: Similar to Front Marker, the visual difference is minimal and you'd be swapping out for completeness sake, not for any actual benefits.
9. Rear Turn Signal
a) LED Used: 1157-R Oxilam on Amazon ($16.99)
b) Ease of Installation: 45-60 mins. By far the most difficult to switch out.
c) Installation Guide: H/T firedawg
d) Hot Take: This was REALLY difficult to install and had to be done almost entirely by touch and feel. The screws you have to remove to access the driver side lights are really difficult to remove. I personally would not have done it if not for the time I had already invested and my OCD to complete the project. Use a adjustable wrench to get some leverage to turn the housing, and leave this for last to get familiar with how to install 1157 bulbs by practicing on the other bulbs. I'd also consider installing each bulb in a separate session to avoid driving yourself crazy!
e) Left - LED, Right - Original Halogen
View attachment 13016
"3rd brake light" is missing or mislabeled in the guide? (The horizontal bar, at the top of rear, that only lights when brake are depressed)

Thank you for this post! I changed our Telly’s headlights and very happy with the result. Your research and guide made it easy.Just completed LED upgrades across all the lights on my S Trim and confirmed that it all functions without error codes and hyperflash.
tl;dr
- Front lights changed includes 1) Headlamps, 2) Turn Signal, 3) Side Marker
- Rear lights changed includes: 4) License Plate, 5) Back Up / Reverse, 6) Tail, 7) Brakes, 8) Side Marker, 9) Rear Turn Signal
- Total cost was just over $200, and about 2 to 2.5 hours of work (excluding failure to find the right bulbs)
- On hindsight, I would have not done the side markers (little visual difference) and the rear turn signal (really difficult to install)
Thought I'd document my entire journey here to make it easy for others who might want to embark on a similar journey. Each section includes:
a) LED Bulb Purchased + Cost
b) Ease of Installation
c) Installation Guide
d) My Personal Take
e) Before / After Image
----------------------
1. Headlamps
a) LED Used: 9005 LASFIT headlights from Amazon ($54.99)
b) Ease of Installation: 5-10 mins
c) Installation Guide: LASFIT YouTube
d) Hot Take: No issue with hyperflash or error codes, would def start with this install as it gives the greatest bang for your buck (visually and ease of installation)
e) Left - Original Halogen, Right - LED
View attachment 13006View attachment 13007
2. Front Turn Signal
a) LED Used: 1157-A Everbright from Amazon ($16.99); H/T: Cacalon on this forum
b) Ease of Installation: 10-15 mins
c) Installation Guide: LASFIT YouTube
d) Hot Take: Use an adjustable wrench to get leverage to twist out the housing
e) Left - Original Halogen, Right - LED
View attachment 13008
3. Front Side Marker
a) LED Used: 194 LASFIT from Amazon ($10.94)
b) Ease of Installation: 10-15 mins
c) Installation Guide: H/T Jazzyone
d) Hot Take: Lowest bang for the buck with very limited visual difference (hence the lack of photos)
4. License Plate
a) LED Used: 194 LASFIT from Amazon ($8.89)
b) Ease of Installation: 5 mins
c) Installation Guide: LASFIT YouTube
d) Hot Take: Easiest installation
e) Left - LED, Right - Original Halogen
View attachment 13011
5. Backup / Reverse
a) LED Used: 912 Auxito from Amazon ($13.99)
b) Ease of Installation: 20-25 mins
c) Installation Guide: LASFIT YouTube
d) Hot Take: It looks more intimidating than it actually is. The visual difference does justify the work required, imo
e) Left - LED, Right - Original Halogen
View attachment 13012
6. Tail
a) LED Used: 1157-R 2 sets of Oxilam on Amazon ($16.99 per set)
b) Ease of Installation: 10-15 mins
c) Installation Guide: H/T itsal
d) Hot Take: Tail lights were easy to change out as part of the "Tail Lamp Assembly" that includes the next 2 lights (Brake and Rear Marker).
e) Left - LED, Right - Original Halogen
View attachment 13014
7. Brake
a) LED Used: 1157-R LASFIT on Amazon ($45.95); Tried ~10 different bulbs on Amazon in the <$20 price range and every single one of them triggered an error code. LEDs tested and failed includes: Oxilam (linked above), 1797, Vehicode, Alla, Phinlion, Auxlight, Auxito, iBrightstar, Luyed, Katur)
b) Ease of Installation: (included in Tail lamp install); Caveat that finding a bulb that worked without triggering error codes was the single most difficult part of replacing this light and took me a full month of back and forth.
c) Installation Guide: H/T itsal
d) Hot Take: Invest in a CANBUS / Error Free bulb as this was the most problematic bulb by far. Luckily this was by far the easiest bulb to swap in and out to test!
e) Left - LED, Right - Original Halogen
View attachment 13015
8. Rear Marker
a) LED Used: 194 LASFIT on Amazon ($10.94)
b) Ease of Installation: (included in Tail lamp install)
c) Installation Guide: H/T itsal
d) Hot Take: Similar to Front Marker, the visual difference is minimal and you'd be swapping out for completeness sake, not for any actual benefits.
9. Rear Turn Signal
a) LED Used: 1157-R Oxilam on Amazon ($16.99)
b) Ease of Installation: 45-60 mins. By far the most difficult to switch out.
c) Installation Guide: H/T firedawg
d) Hot Take: This was REALLY difficult to install and had to be done almost entirely by touch and feel. The screws you have to remove to access the driver side lights are really difficult to remove. I personally would not have done it if not for the time I had already invested and my OCD to complete the project. Use a adjustable wrench to get some leverage to turn the housing, and leave this for last to get familiar with how to install 1157 bulbs by practicing on the other bulbs. I'd also consider installing each bulb in a separate session to avoid driving yourself crazy!
e) Left - LED, Right - Original Halogen
View attachment 13016
Edit: nvmd I’m an idiotHey there. I’m looking for tutorials on how to install new reverse and license plate lights on my 2022. Was there a guide/video you followed? TIA

I can’t for the life of me pop the lift gate handle open to swap out the reverse lights. Any tips?So tomorrow, the 20th, will be one month of ownership. I decided to upgrade the license plate and reverse bulbs to LED as many here have. I have a 22‘ AWD SXP NF/T in Gravity Grey/Black Napa which comes with about 99% LED lighting throughout the vehicle. Not sure why Kia skimped on $20-50 worth to complete the set. But anyhow, i used different LEDs from most of the forum and bought them together at my local Autozone for $50. Amazon had the license plate diodes for about $3 dollars less but didn’t have the reverse diodes and figured I was already going to Autozone so I bought both of them there. While it seems slightly less expensive Amazon orders have worked and probably just as well, I decided to go with bulbs that I put into my 16‘ Subaru Outback Limited 2.5i w/Eye Sight. Figured that I already dropped 55k in cash on a vehicle I might as well make sure that the LEDs were from a reputable brand with a warranty on the diodes.
Now the work was pretty simple after some research. License plate bulbs took basically no time and I think it was well worth the swap as it completes the nice crisp white headlight/fog lights of the SX. These lights are on at all times when the headlights are active so this was my most important light mod. Now, the reverse LED’s I am not sure if it was a great value in a swap. The swap I did at night and really didn’t take much effort. Initial thoughts is that the LED brake lights actually drown out the reverse lights anyway and was hard to tell if the new LEDs made a difference. When off the brakes it does seem brighter or more clear and crisp lighting which i think will help others visibly notice I am in reverse rather than me being able to see better. Could be the reverse camera or my brightness settings but doesn’t seem like it did much in terms of illumination. Now, I would have to say the the appearance of the reverse LEDs look way better and again completes the SX LED lighting. One final positive overall is that I believe these diodes are drawing less amp than the OEM bulbs. So far I have not received any hyper flash or errors. I don’t suspect I will since I have been running these diodes on my Outback for about 6 years with no issues.
Need to grasp and rotate the handle with your finger tips gripping on the top inside of the handle. It flaps open away from the front of the car. You can use utility gloves for extra grip, I was able to do it without them though.I can’t for the life of me pop the lift gate handle open to swap out the reverse lights. Any tips?
2 attempts of squeezing with all my might (and gloves) to no avail. I’ll keep trying but man is my handle stubborn. I can’t imagine it’s any different on a 22. There is a small slot on mine that looks like screwdriver access but I don’t want to risk marring the plastic.Need to grasp and rotate the handle with your finger tips gripping on the top inside of the handle. It flaps open away from the front of the car. You can use utility gloves for extra grip, I was able to do it without them though.
 thanks!
No Hyperflash? They blink normally?I used these and they are great. Obviously replace them with like colors, but the fronts are easy to replace, threats, I have an S, in have not messed with.